Difference between revisions of "EMD-API - Wind Energy Index Service"
(Created page with "Category:EMD-API To be completed.") |
m |
||
| Line 1: | Line 1: | ||
[[Category:EMD-API]] | [[Category:EMD-API]] | ||
| − | + | == Introduction == | |
| + | The wind-energy-index service is available as a global service - providing reliable wind-index information for any part of the world. | ||
| + | |||
| + | |||
| + | == Python - Installation == | ||
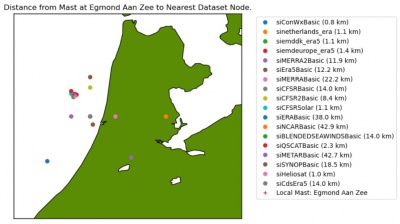
| + | [[Image:EgmondAanZee.jpg|thumb|400px|right|Data nodes near the Egmond Aan Zee Offhore ]]The simplest way to use the EMDAPI with python is to install the client software in a virtual environment. If you are using CONDA or [https://docs.conda.io/en/latest/miniconda.html MINICONDA], we recommend that you create a new virtual environment and use a recent 3.x version of python. When the virtual environment is created, then activate the environment. | ||
| + | |||
| + | ''Open your Anaconda Prompt. Copy-paste the following lines:'' | ||
| + | <pre> | ||
| + | conda create -n emdapiclient python=3.8.5 | ||
| + | conda activate emdapiclient | ||
| + | </pre> | ||
| + | |||
| + | Install the required packages needed in order to do data-science and use the examples provided within the jupyter notebooks. We have have validated this setup using specific package versions (used in the commands below). | ||
| + | |||
| + | ''In the Anaconda Prompt, copy-paste the following lines, one by one:'' | ||
| + | <pre> | ||
| + | conda install -c conda-forge pandas=1.1.0 numpy=1.19.1 | ||
| + | conda install -c conda-forge matplotlib=3.3.1 basemap=1.2.2 basemap-data-hires=1.2.2 | ||
| + | conda install -c conda-forge jupyter=1.0.0 ipykernel=5.3.4 | ||
| + | conda install -c conda-forge python-wget | ||
| + | </pre> | ||
| + | |||
| + | Download the [https://help.emd.dk/mediawiki/images/7/73/20201206_python_client_generated.zip zipped-file] holding the OpenAPI python client. <br> | ||
| + | Unpack the file and install it within your virtual environment: | ||
| + | |||
| + | ''In the Anaconda Prompt: Move to the folder, where you have unpacked the zipped file. Copy-paste the following line:'' | ||
| + | <pre> | ||
| + | python setup.py install | ||
| + | </pre> | ||
| + | |||
| + | Make sure that the new emdapi virtual enviroment (python-kernel) is available to be used with jupyter-notebook environment: | ||
| + | <pre> | ||
| + | python -m ipykernel install --user --name=emdapiclient | ||
| + | </pre> | ||
Revision as of 17:15, 7 December 2020
Introduction
The wind-energy-index service is available as a global service - providing reliable wind-index information for any part of the world.
Python - Installation
The simplest way to use the EMDAPI with python is to install the client software in a virtual environment. If you are using CONDA or MINICONDA, we recommend that you create a new virtual environment and use a recent 3.x version of python. When the virtual environment is created, then activate the environment.
Open your Anaconda Prompt. Copy-paste the following lines:
conda create -n emdapiclient python=3.8.5
conda activate emdapiclient
Install the required packages needed in order to do data-science and use the examples provided within the jupyter notebooks. We have have validated this setup using specific package versions (used in the commands below).
In the Anaconda Prompt, copy-paste the following lines, one by one:
conda install -c conda-forge pandas=1.1.0 numpy=1.19.1
conda install -c conda-forge matplotlib=3.3.1 basemap=1.2.2 basemap-data-hires=1.2.2
conda install -c conda-forge jupyter=1.0.0 ipykernel=5.3.4
conda install -c conda-forge python-wget
Download the zipped-file holding the OpenAPI python client.
Unpack the file and install it within your virtual environment:
In the Anaconda Prompt: Move to the folder, where you have unpacked the zipped file. Copy-paste the following line:
python setup.py install
Make sure that the new emdapi virtual enviroment (python-kernel) is available to be used with jupyter-notebook environment:
python -m ipykernel install --user --name=emdapiclient
